
The 21st birthday is a milestone eagerly anticipated, especially by college students ready to step into the realm of adulthood and legality. For a lady’s celebration, the planning and crafting take center stage, and wine bottles become the canvas for unique and dazzling creations. This guide unveils a delightful journey of turning ordinary wine bottles into personalized and glittering masterpieces, perfect for gifting on this momentous occasion.
Wine bottles, with their diverse shapes, sizes, and colors, offer a creative outlet for crafting enthusiasts. Instead of letting them gather dust, these bottles can be repurposed into charming decorations or, more specifically, into the ideal present for a friend’s 21st birthday.
Crafting Essentials:
Before delving into the crafting process, gather the essentials:
- Wine bottle (of any size)
- Paint (spray paint or acrylic)
- Paintbrushes or sponge painting brushes
- Glitter
- Crafting glue (Modge Podge brand recommended)
- Rhinestones (optional)
- Cardboard box or newspaper
Removing Labels:
Prepare the wine bottle for crafting by removing labels. Submerge the bottle in hot, soapy water, allowing labels to soak for 10-15 minutes. Afterward, remove any paper residue, and let the bottle dry for an additional 15 minutes.
Painting the Basecoat:
Choose a wide paintbrush for the basecoat, ensuring a smooth and even application. Opt for a white or black basecoat to make subsequent designs or glitter stand out. Alternatively, if the original bottle color appeals to you, skip the basecoat step.
Crafting Options:
- Design Painting:
- Materials Needed:
- Paintbrush kit
- Painter’s tape
- Additional paint colors
- Search for design inspiration on creative platforms like Pinterest.
- Let each element of the design dry for 10-15 minutes before moving on to avoid accidental color mixing.
- Allow the completed design to dry overnight before applying Modge Podge for a shiny finish.
- Materials Needed:
- Glitter Application:
- Option 1 (Spray Glitter):
- Use spray paint glitter for even coverage.
- Place the bottle on cardboard or newspaper, spray the glitter, and let it dry for 30 minutes.
- Apply a thin coat of spray Modge Podge for a protective outer covering.
- Option 2 (Loose Glitter):
- Apply a thin coat of Modge Podge with a sponge brush.
- Immediately apply glitter evenly by shaking it onto the bottle or using a paper funnel.
- Let the bottle dry completely and repeat the Modge Podge covering for protection.
- Option 1 (Spray Glitter):
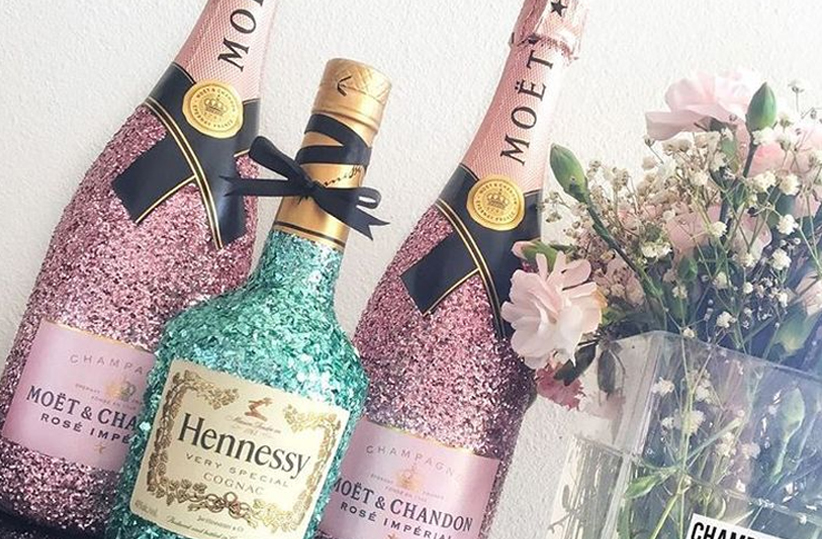
Personalized Glittering Bottles:
These personalized glittering bottles make for unique and thoughtful gifts. Whether adorning your home or presenting them to friends, these crafted wine bottles encapsulate the spirit of celebration and the joy of turning 21. Crafting memories has never been more delightful, as these transformed bottles become cherished symbols of creativity and friendship, marking the beginning of a new chapter in a young adult’s life.